Building a 'Puppy Palace'
Featured: August, 2002
This project started out because I needed a place to whelp and raise pups.
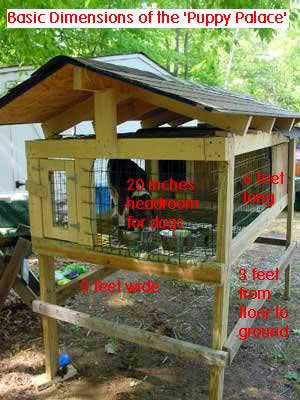 I
couldn't find any plans online that showed how to make an above ground
kennel for puppies and the bitch. I wanted something above ground
that would allow me easy cleanup --> the 'Puppy Palace' was born.
I guestimated on the size that I wanted it and got to work drawing a rough sketch and a list of materials. I wanted everything that would be exposed to the elements (and pee'd on) to be pressure treated and galvanized, and everything that the puppies or bitch could get at regular untreated pine. I also knew I wanted to have two doors into it -- one in the front and one from the back; directly into the house.
Supplies needed:
- 4 - 12 foot 2x4
- 4 - 12 foot 2x4 pressure treated
- 2 - 8 foot pieces of 1x3
- 1 - 50 foot roll of vinyl covered 3' fencing
- 2 - bundles shingles
- 1 sheet of particle board
- 1 sheet 1/2" plywood
- box galvanized fence staples
- box galvanized 2-1/2" deck screws
- box galvanized 1-1/2" deck screws
- box roofing nails
- 4 hinges
- 2 latches
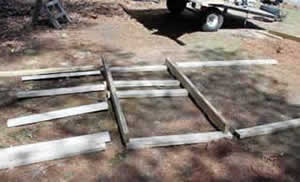 I
started by cutting out the basic frame:
- 4 legs, 56" pressure treated 2x4
- 2 floor supports (length), 6 feet pressure treated 2x4
- 3 floor supports (width), 3 feet pressure treated 2x4
- 3 roof supports (width), 3 feet 2x4
Then I connected all with galvanized deck screws (will be nice if I ever have to take it apart). I also cut a few 6 foot sections of the vinyl covered fencing. I then cut out the floor of the house out of regular 1/2" plywood -- and added a diagonal floor brace for under the house.
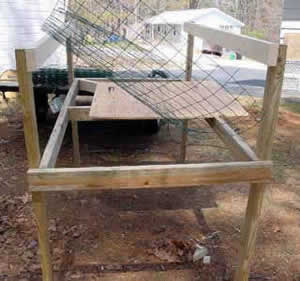 Then
I got out the galvanized fence staples and attached the fencing.
I put two layers of the fence on the bottom, front and sides; and
aligned it so that the gaps were smaller. Didn't want any puppies
to get stuck in the roughly 1-3/4 x 3" gaps, so by doubling
it up and offsetting the mesh, I reduced the gaps down by half. Then
I framed in the front door out of 2x4 and built the front door out
of the 1x3" pine and a piece of the fencing. Then I cut the
front house opening from a piece of plywood and screwed that in place.
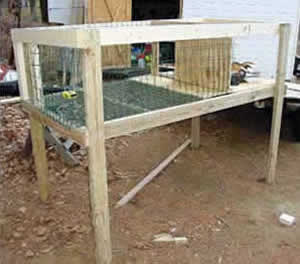 Then
I attached the front door (9-1/2"x16") and hinges and framed
in the house door opening (9-1/2"x12"). I then cut out
(particle board) and put up the sides. It really started to take
shape nicely at this point.
Note: all fencing is on the inside of any pressure treated wood, so the dogs can't get at it. Pressure treated wood is very bad for dogs should they chew on and ingest it.
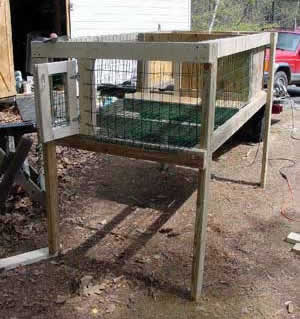 Then
I cut out the rear (plywood) for the back wall of the house and cut
the rear door with a jigsaw and got the hinges in place.
Then I put a layer of fence over the top in the front, and a layer of particle board over the house in the rear.
All that was left at that point was to cut out the roof supports, cut out the particle board roof sheets, connect it all and shingle it. The last touch was to put up a piece of 1x3 at the bottom of the house opening so the young pups would be kept inside and not wander out and get stuck in the wire flooring. This can be taken off as they get bigger.
I'll be putting some insulation around the house, covered with tar paper, if I ever have a litter during the cooler weather.
I don't claim to be much of a carpenter, but I managed to complete this in about 7 or 8 hours, total -- and spent under $100. Not bad for a hack. *smile*
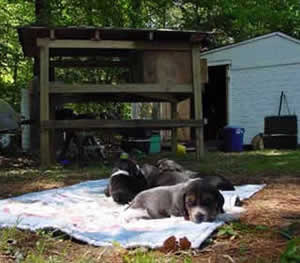
I hope this helps someone out there, or at least gives them something to build on when it comes time for them to house puppies. If you find this plan useful or helpful, send me an e-mail and let me know how it went and any modifications that you made to make it better.

Enjoy your hounds!


